
Knowledge Base
Knowledge Base
Enterprise Mode Overview
Shanon Mulley on September 16, 2013
This article describes how enterprise mode can be used to improve the workflow of your business. Please note, that enterprise mode is only available if you have purchased the enterprise mode module for DecEzy. If you have not, then most of the functionality discussed in this article will not be available to you.
Enterprise mode adds functionality to DecEzy to assist with the processing of sales orders. Essentially, it breaks orders up into components (based on designs and the items they are linked to), and allows you to indicate which of the components of the orders are complete. This can then be used to assist with invoicing, as you know what is complete.
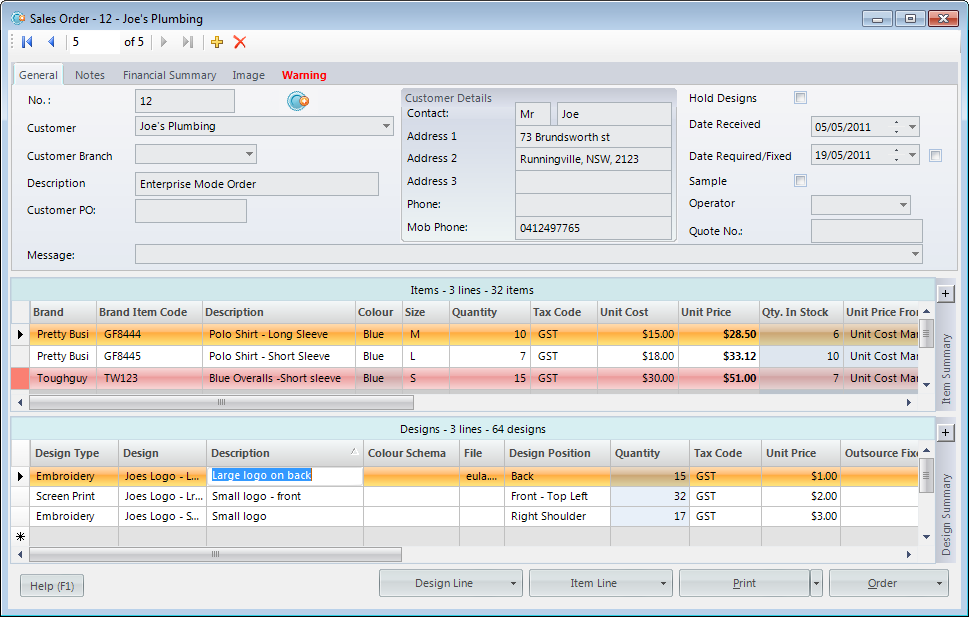
We start off with an order. The one we will use for this demonstration has three item lines, and three design lines. They are linked as follows:
- First embroidery line (Large embroidery) is linked only to the blue overalls.
- Screen printing line is linked to all the item lines.
- The second embroidery (small logo) is linked only to the two polo shirts.
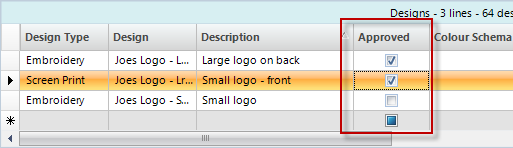
To begin processing, we first of all need to approve the designs. This indicates that the designs have been approved (by both the customer and someone with authority in the business), and it is ok to start processing them. In this demonstration, we will only approve the first two designs, as shown below. Note that the columns have been re-arranged so as to see relevant columns next to each other.
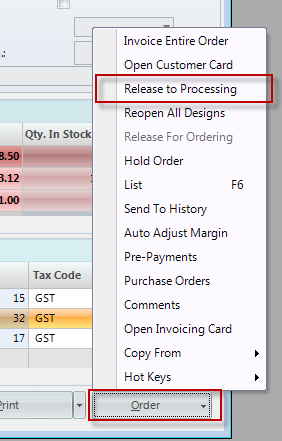
Next, we release the order to processing, by selecting Order>Release to Processing. This action takes all of the released designs, and creates appropriate order processing lines for them.
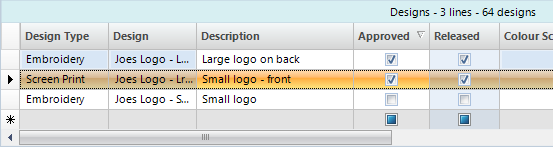
After this has been run, the Released checkbox on the design lines should be checked, as shown below:
Now the designs are released, we can start processing the job. When it comes to processing jobs, there are two main ways we can do it. We can process by order, or process by design. While the two methods are not mutualy exclusive (you can use both methods at the same time), you will more than likely pick a method that best suits your business.
- By Order – If you work through order at a time, or assign a whole order to a single employee, then by order may be more appropriate.
- By Design – If you tend to splice and dice your work, working your way through numerous orders at the same time, then by design may be more appropriate.
Keep in mind, the above is just a suggestion. You will need to work out which is the most appropriate method for you. In the company setup, on the workflow tab, you can set up your default processing method – either "By Sales Order" or "By Design Line". The only impact of this, is what happens when you click on the "Order Processing" button on the main menu.
Processing by Order
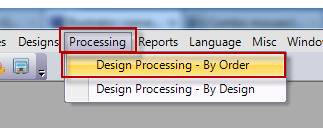
First we will go through processing by order. To open up the processing by design window, select "Processing>Design Processing – By Order" from the top menu, as shown below.
This will show a list of all orders with designs waiting to be processed (that is, orders with released designs, that have not been processed yet. Ours looks like this, as we only have one released order.
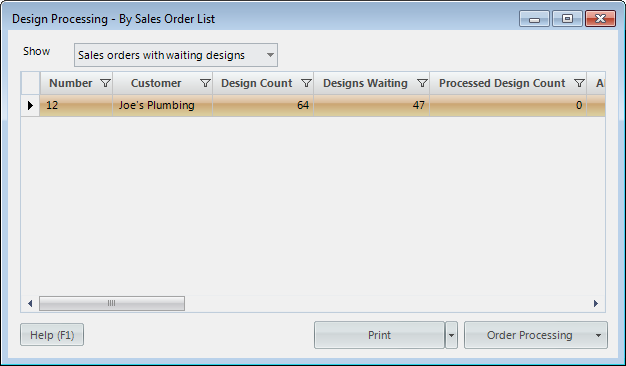
As you can see, it is showing us key information about the order:
- Design Count – The total number of designs on the order.
- Designs Waiting – The total number of designs on the order that have been released and not processed.
- Processed Design Count – The total number of designs on the order that have been processed.
From here you can either print out the design details of the order (from the print menu), or open up the order processing card. We will skip over the printing, and go straight into the card, as this is where the processing details are entered.
To do this, we double click on the line. The "Design Processing – By Sales Order Card" will look something like this:
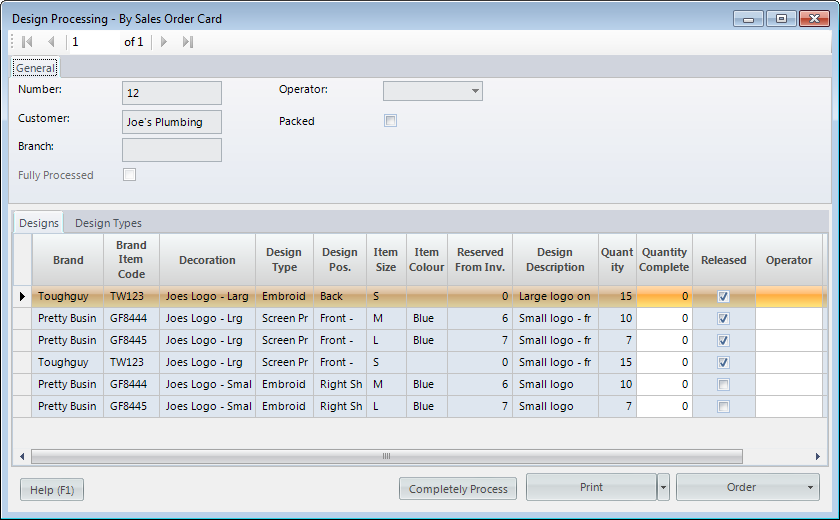
As you can see, the order has been broken down by item/design combination. The large screen printing logo appears three times, as it is on three different items on the order, whereas the large embroidery only appears once, as it is only on one item in the order. As well as basic item/design information, there are a few columns you should be aware of:
- Reserved From Inv. – Shows how many units of the item on this line are reserved from inventory. Usually an indicator of if you can actually process this line (as you have/dont have stock).
- Quantity – How many of this design/item combination are required.
- Quantity Complete – How many of this design/item combination are complete. This field can be updated, and should be updated as designs are completed.
- Released – Shows if the design line is released or not. In this example, you can see the two lines for the design we didnt release are displayed as such. You will not be able to update a line if it is not released.
- Operator – You can select who this line is allocated to, or was completed by, by populating the operator field.
Alternatively, if you move to the "Design Types" tab, you will see the same information displayed in a summary view, by design type:
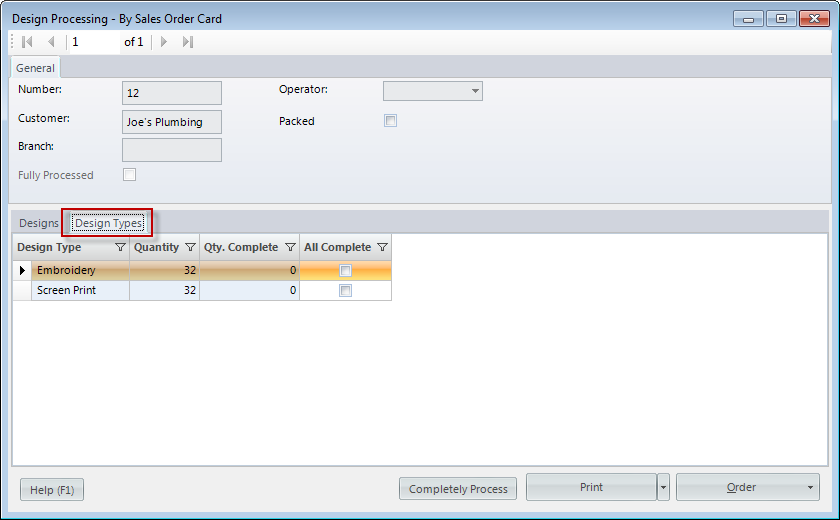
The general idea of design processing is that as you complete designs (in this case, apply embroidery and screen prints to clothing), you mark it off as such. On this window, there are two ways to mark off designs as complete.
- On the "Designs" tab, you update the "Quantity Complete" column as you complete designs. You may wait for an entire line to be complete before updating it – how often you update is up to you.
- On the "Design Types" tab you check the "All Complete" checkbox once all of a given design type is complete.
Processing By Design
Next we will discuss processing by design. To open the "Design Processing – By Design" window, select Processing>"Design Processing – By Design":
This will open the "Design Processing – By Design" window. This shows similar information as the "By Order" window does, but shows it for all orders at the same time, and only shows released lines.

For this example, we can only see the designs for one order, but if you have numerous orders with released designs, you will see them here also. From here, you can allocate work (by populating the operator field), and print out individual lines, or ranges of lines, so you can give information to employees.
We will use the "By Design" window to update this orders processing lines. To do this, we update the "Quantity Complete" field, as shown below:
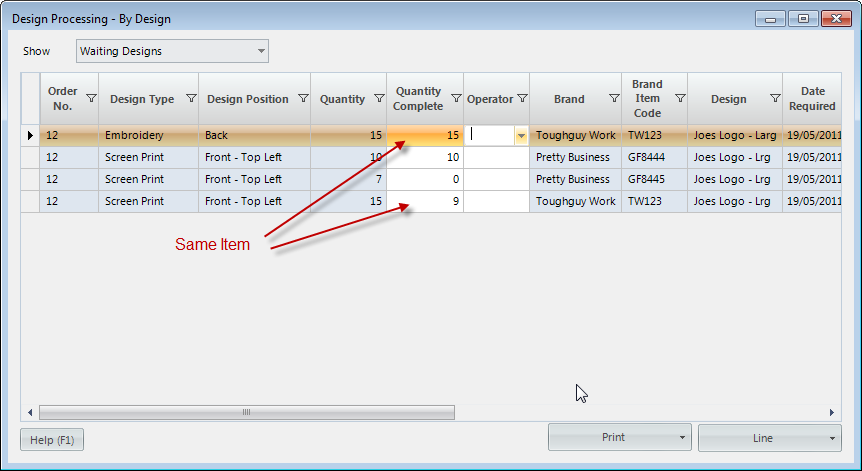
Notice that the item "TW123" appears on two different lines (as it has two designs), and the designs for those lines have been updated with different quantities.
Invoicing Orders
Now that we have completed some designs, we want to do some invoicing. To do this, we click on the "Sales Order Invoicing" button on the main menu.
This opens up the sales order invoicing list. For our example, it initially looks like this:
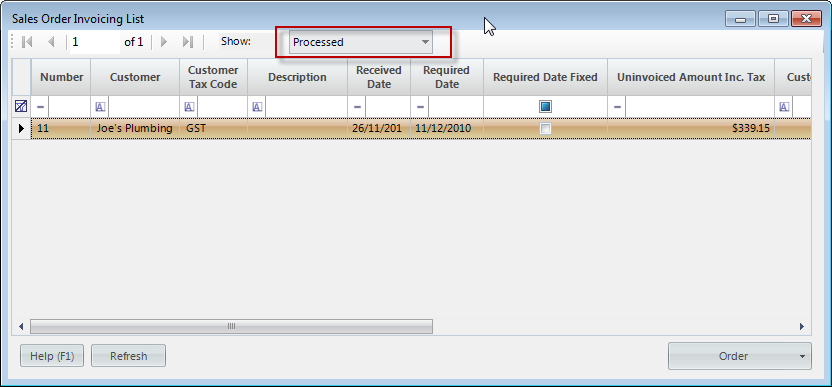
Its currently displaying only one order. But its not the order we have processed. This is because, by default, the invoicing list will show only orders that are fully processed. This is denoted by the option in the red box. As our sample order is only partially processed, it will not show. This order is showing, because it has no designs, so the system sees it as being fully processed.
In order to invoice our sample order, we need to change the "Show" option to "All".
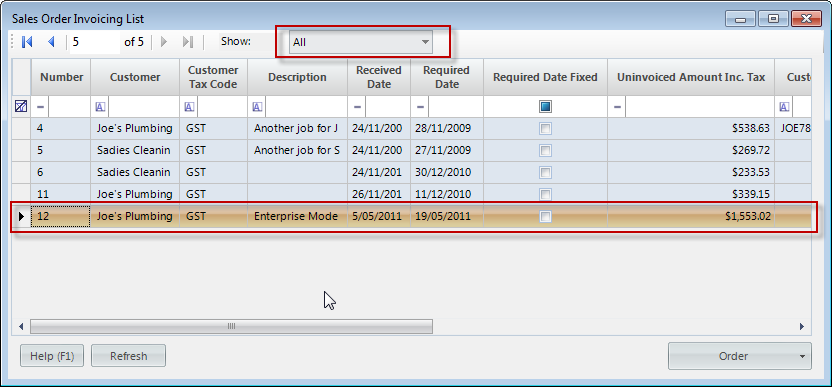
Now we can see our order (in the red box). To open it up, we double click on it.
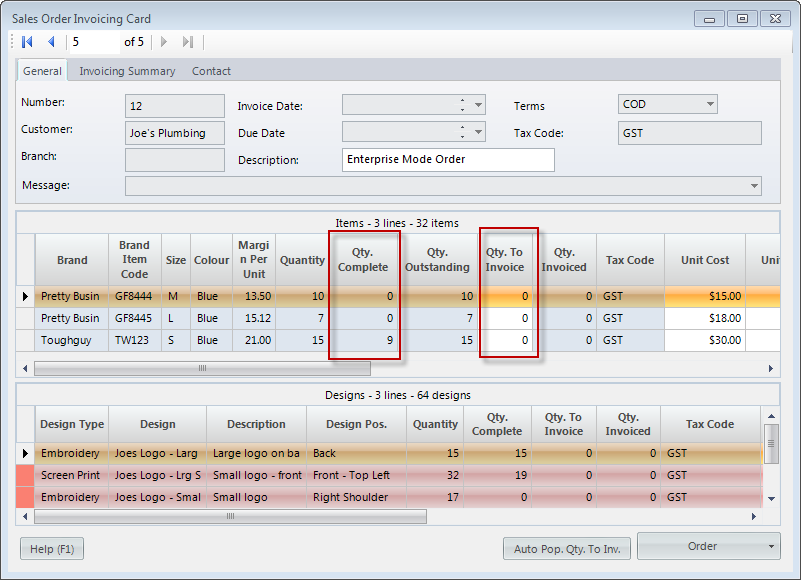
At this point, it is important to note that when designs are linked to items, the invoicing is controled by the items. If we tell the system that we are invoicing a given item, it will automatically invoice the designs are are linked to it. For this reason, we will be updating only the lines in the top half of the window (the item lines).
Two important columns have been highlighted with a red box. The "Qty. Complete" column column tell us how many of these items are fully processed. Be aware that in calculating this figure, the system takes the minimum number that has been processed against all of the linked designs. In this example (for our line which has 9 items complete), it is linked to two design lines. One of them had all 15 units complete, and the other had 9 complete. So, in this case, it took 9 as being the quantity complete.
The "Qty. to Invoice" field indicates how many units will be invoiced next time we create an invoice. By default, it is set to zero. If you click on the "Auto Pop. Qty. To Inv." button (auto populate quantity to invoice), it will automatically update the "Qty. to Invoice" fields with how many units it thinks you can invoice (essentially, the quantity complete). We will do this below:
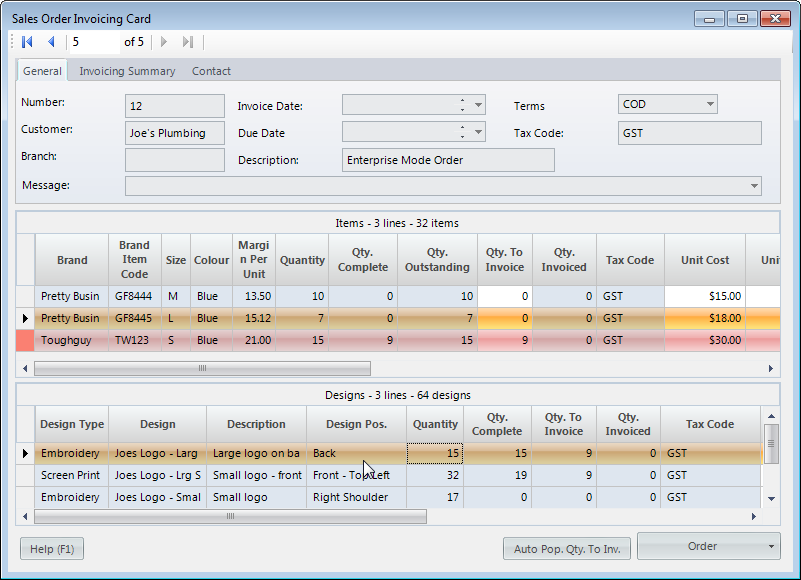
The system has now updated the quantity to invoice for one line to 9. You will notice that only two of the design lines have been updated (to 9 units), even though they have many complete. As stated earlier, this is because the invoicing is controled by items.
From here, the invoice is generated as normal.